comfyui Interface Exploration Tutorial
Introduction
ComfyUI 2.0 introduces a modernized node-based interface, enhancing user experience and workflow management. This tutorial will guide you through the main interface of ComfyUI 2.0, helping you understand nodes, connections, and basic workflow operations. Whether you’re a beginner or upgrading from an older version, this will get you started quickly.
Main Interface Overview
Upon launching ComfyUI 2.0, you’ll see a clean yet powerful main interface divided into these key areas:
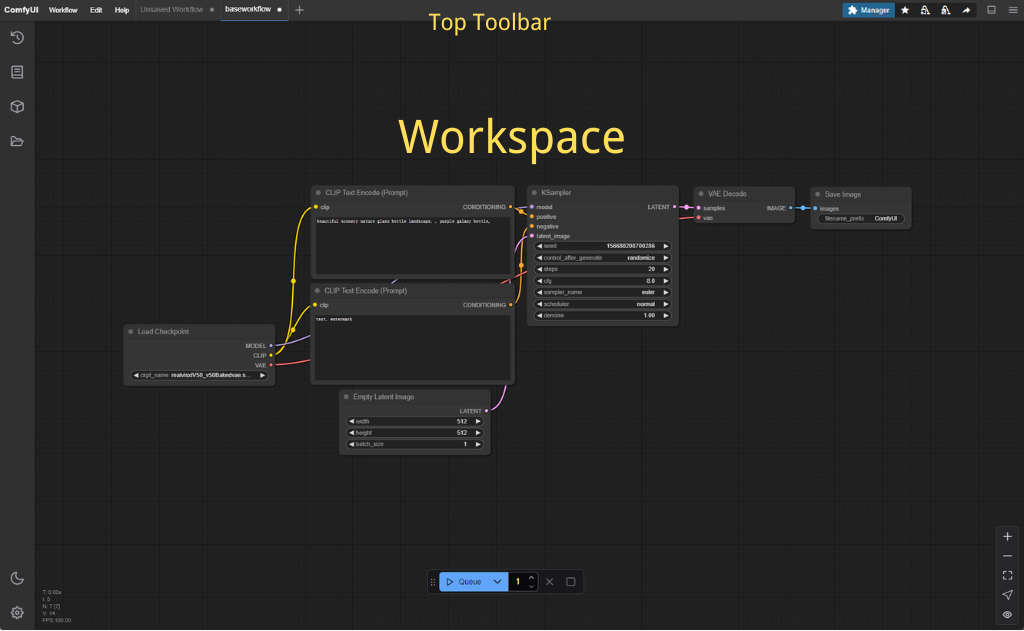
Workspace
The central area for building and managing node workflows.
In 2.0, the workspace supports infinite scrolling and zooming, with a default gray grid background.
Use the mouse wheel to zoom or hold the middle mouse button to pan.
Top Toolbar
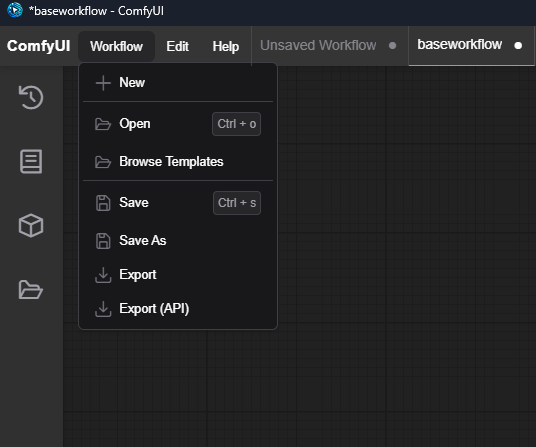
Includes buttons like “Load Workflow,” “Save,” “Clear,” and “Queue Prompt.”
Version 2.0 adds a “History” button to review recent generation results.
Right Panel
Displays “Node Properties” by default, where you adjust settings for selected nodes.
Switchable to “Queue Manager” to monitor task progress.
Left Sidebar
Offers quick access to common nodes like “Load Checkpoint” and “CLIP Text Encode.”
Optimized in 2.0 with a searchable, streamlined layout.
Understanding Nodes and Connections
ComfyUI’s core is its node-based design. Each node represents a functional module, linked together to form workflows.
Adding Nodes
Double-click the workspace to open the node selection window.
Type a keyword (e.g., “Load”) in the search bar and select “Load Checkpoint” to add a model-loading node.
In 2.0, you can also drag nodes from the left sidebar directly into the workspace.
Connecting Nodes
Nodes have input (left) and output (right) ports.
Click and drag from an output port to an input port to connect them; release to confirm.
Connection colors indicate data types (e.g., green for models, blue for images).
Adjusting Node Layout
Click and drag a node’s title bar to reposition it.
Right-click a node to “Collapse” or “Delete” it.
Basic Workflow Operations
Let’s explore the interface with a simple workflow:
Creating a Basic Workflow
Add a “Load Checkpoint” node and select a Stable Diffusion model (e.g., sd_v1.5.safetensors).
Add a “CLIP Text Encode” node and enter a prompt (e.g., “a cute cat”).
Add a “KSampler” node, setting steps (e.g., 20) and CFG scale (e.g., 7.5).
Connect these nodes logically.
Running the Workflow
Click “Queue Prompt” in the top toolbar.
The right panel shows task status, and the image generates upon completion.
Saving and Loading
Click “Save” to store the workflow as a JSON file.
Use “Load Workflow” to import existing workflows.
[Image: Complete node layout of the simple workflow and its output]
Navigating and Customizing the Workspace
ComfyUI 2.0 offers flexible navigation and customization options:
Navigation
Zoom the workspace with the mouse wheel.
Hold the spacebar and drag to pan quickly.
Use “Reset View” in the top toolbar to return to the default view.
Customization
Right-click the workspace and select “Settings” to adjust grid size or background color.
In the “Node Properties” panel, right-click settings to save them as defaults.
[Image: Workspace after zooming and panning]
Conclusion
By now, you’ve explored the ComfyUI 2.0 main interface, learned node connections, and performed basic workflow operations. You’re ready to tackle more complex generation tasks or dive into custom nodes. Keep experimenting—ComfyUI’s potential is limitless!